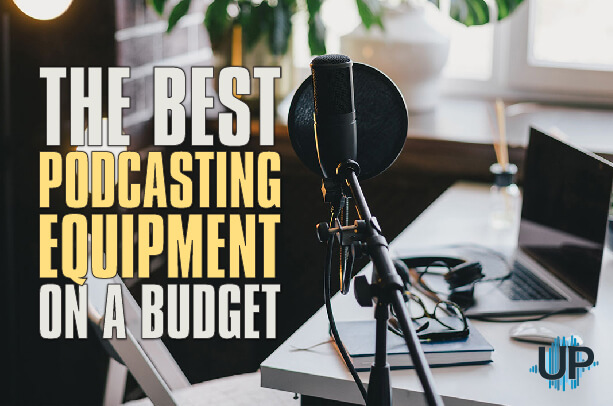
The Best Podcasting Equipment on a Budget
The quality of your episodes is heavily influenced by the podcasting equipment and software you use to produce your podcast. Of course, as a podcast host or guest, your primary focus should be on delivering high-quality content rather than gathering an extensive collection of costly and fancy podcasting kits.
Tip: Make a budget for your podcasting equipment
Before you go out and buy high-priced podcast equipment, you should set a budget that works for you. Trust me — it'll make things much easier for you. Perhaps you've been in the game for a while and can afford some high-tech gear. If you're just getting started, you might not need to spend as much money on a podcast beginner kit. In any case, begin with a figure that fits within your budget.
As your audience expands, you can always upgrade and buy more. Whether you're starting a show from scratch and need a whole set of equipment or you’re trying to fill in gaps with the podcast equipment you already have, these are my recommendations for essential podcast host equipment.
But First, What Basic Podcast Equipment Do You Need?
To begin with, I recommend you start with the following podcasting equipment:
- Microphone
- A camera (if recording video)
- Headphones
- Recording software
Microphone
A podcasting microphone is the most important piece of podcasting equipment. It affects your sound quality and can save you time in post-production. Some creators can tolerate so-so video quality — but never low-quality audio.
Some podcasting microphones are made to reduce ambient noise, but they create less sharp sound. These are dynamic microphones and are better suited for recording in a home studio.
On the other hand, a condenser mic is more sensitive to noise and will pick up on subtle sounds and more nuanced vocals. This is the podcast mic to use if you want to record in a standard recording studio with outstanding acoustic treatments.
Note: I'm just sharing what “I” use or would recommend for you to take your audio quality to the next level.
Dynamic and Condenser microphones are available in two broad categories:
USB Microphone: These mics connect directly to your computer. They're a great option for beginners because of their easy setup.
XLR Microphone: XLR mics plug into an interface or digital recorder instead of directly to a computer. These are usually for professional setups.
Based on these two categories, these are my top podcast microphone recommendations:
The Blue Yeti USB Microphone
Blue Yeti is known for producing high-quality, low-cost items that are simple to use. This microphone is no exception, and some podcasters swear by it. It has customizable polar patterns, but it is sensitive and not suitable for a noisy environment.
One of my favorite features of the Blue Yeti is the simple headphone jack, which lets you hear your own voice while talking. This helps you evaluate how you'll sound on the show. With this, you won't end up recording yourself for 20 minutes or an hour just to discover that the gain was off or that you should have talked closer to the microphone.
All of the controls you need are there in front of you. They are clearly labeled, making them simple to use (especially if you have little audio experience). You'll be able to quickly resolve any recording glitches and get back to recording the podcast.
Blue Snowball ICE USB Microphone
Blue Snowball Ice has become a staple when it comes to podcasting equipment, delivering high-quality audio free of digital signal processing (DSP) at an affordable price. A status LED on the top front face illuminates when the accompanying USB connection is hooked to the microphone and a recording source.
It doesn’t have a headphone jack for zero-latency monitoring – however, this isn't a dealbreaker if you're only recording a podcast. In fact, for podcasters, not having to bother about headphones may be liberating—all you have to do is talk!
Although it can’t compete with other microphones, it’s affordable enough that you may get multiple of them for the price of a single higher-tier alternative.
AT2005USB
I'm very loyal to Audio Technica.They have a great starter mic for podcasting. It's almost always the #1 recommended mic I recommend for new podcasters.
AT2005USB is a versatile microphone that can take you from the stage to the studio and beyond. This handheld microphone has two outputs: a USB output for the digital recording and an XLR output for use with a sound system's conventional microphone input. The microphone connects to your computer's USB port and works in tandem with your favorite recording software.
It also has an excellent analog-to-digital converter and a headphone output with level control for monitoring. Its cardioid polar pattern reduces noise pickup from the sides and rear. This microphone is ideal for podcasting, home studio, field, and voiceovers.
The last one I’ll be sharing with you is what I use for my podcasts.
Audio-Technica AT2020 Cardioid Condenser Studio XLR Microphone
This is an entry-level cardioid condenser microphone, despite its specifications and, more significantly, the audio quality it delivers.
Because of the quality of the audio it produces – a very close representation of the original sound – this microphone is particularly well-suited to podcast recordings.
It also has a black cast metal construction, with two levels of wire mesh shielding the main capsule and aiding in pop reduction – though, as a general rule, you should always try to record with an additional pop filter.
Understandably, the top-notch audio quality provided by the AT2020 makes it an incredibly natural choice for podcasting, especially given its lower price point compared to other mics on the market.
Camera
Adding visual elements in your podcast keeps your listeners engaged and allows you to provide a myriad of fascinating content – but poor video quality will also irritate your audience to the point of tuning out.
The truth is you can get by using a smartphone or a webcam. However, if you will be submitting your video to YouTube and other major video streaming services such as Facebook, you'll want to make it appear top-notch and on par with the biggest platform creators in terms of quality.
There are thousands of podcast cameras on the market. Remember that the more you spend on podcasting equipment, the higher the quality.
If you’re recording short podcast episodes, my first recommendation is a great fit for you…
Canon EOS Rebel T6
With only 30 minutes of recording time, this camera is unsuitable for lengthy podcasts. The Canon EOS Rebel T6 features a built-in WiFi and NFC connection, allowing you to share your videos and photos easily. It includes sharing on specific social media channels.
This camera also has an amazing autofocus performance, a 3-inch LCD panel, a built-in feature guide, continuous shooting, and a full HD Movie Mode that makes shooting podcast videos a breeze.
Now what if you’re filming longer podcast episodes?
Nikon D3500
With a battery life of just over an hour, this camera is perfect for recording your long form podcast episodes. The Nikon D3500 is a quality, professional-grade camera. This camera is lightweight and balanced, yet compact enough to travel with and durable enough to go in those challenging situations.
You can browse all of your photos and videos from your smartphone or tablet by installing Nikon's free Snapbridge app. This camera also has capabilities like continuous shooting, full HD video, and a 15x bigger image sensor than typical smartphones.…Are you looking for advanced, professional-level high definition video capabilities?
Canon EOS 5D Mark III
This camera is an awesome compact and lightweight option for any podcaster looking to branch out into videography. Peripheral illumination correction, chromatic aberration correction, distortion correction, manual exposure control, different frame rates, and selectable All I-frame or IPB compression are all unique features – need I say more?
Plus, this camera features an in-built capability that automatically splits files larger than 4GB for more extended recording without unwanted interruptions.
Headphones
A great set of headphones is essential for consistently recording high-quality podcast audio.
Unfortunately, as with a lot of podcasting equipment, there are many options on the market and it can be challenging to determine what you need for your specific setup.
Here's why headphones are essential in the first place and how they can help you make a better podcast:
- Headphones allow you to hear your podcast's audio exactly as your audience will, putting you in control throughout the recording process.
- Help you to improve your mic technique.
- Help you reduce ambient sound and improve overall audio quality.
While it is technically possible to record a podcast without headphones, you will almost certainly encounter some surprises during editing that will be tough to remove and, at worst, make your recording unusable.
Before we continue, keep in mind that reviews on podcasting equipment are highly subjective. Different individuals swear by different things, and it can be a challenge to determine which of their preferences fit with your own.
As a huge fan of Audio Technica — I'd love to start with a headphone from this brand.
Audio Technica M20X
These Audio Technica ATH-M20x professional monitor headphones are built primarily for studio recordings, sound mixing, and a wide range of other audio-recording needs. This style is a high-end model at a reasonable price that will meet your requirements without breaking your budget.
The closed-ear design reduces environmental noise, so you don't have to turn up the volume to insulate from random sounds when needed. They protect your ears comfortably with their oxford cloth headband and feel excellent all day. These attractive oval-shaped ear cups feature rexine padding for softness and all-around ear covering.
Audio-Technica designed the sound to produce professional-grade headphones that capture the actual sound from the ground up. It has 45mm large-aperture drivers that provide clean audio throughout the day or during long podcast sessions. They ensure that everything sounds very clear when playing through this product, even if it is deafening!
But don't worry about any noise emanating from them because they have a 47ohm impedance rating to reduce that. If you utilize this brand with other audio equipment, you can rest assured that it will perform flawlessly.
These budget-friendly audiophile-grade headphones have outstanding sound with no distortions, thanks to quality drivers and accurate frequency response.
Audio Technica ATH-M50X
The Audio Technica ATH-M50x is regarded as the most outstanding on-ear headphone set for your money. Though not wireless (a Bluetooth adapter is available for purchase), the headphones come with three separate cords and are foldable for convenient portability.
It's a good studio headphone with a relatively neutral response for the price that contains several bumps designed to improve critical listening. The X model features numerous uncomfortable retrofits to make it more consumer-friendly… and I believe the effort was successful.
It's also adaptable since the earpieces can be rotated up to 90 degrees and left flat. They can output frequencies ranging from 5-28,000 Hz and have a maximum input power of up to 1600 mW.
Although this is not as successful as the top-tier podcasting equipment, these will work in various ways to meet your needs.
The Sennheiser 280 PRO
The Sennheiser 280 PRO headphones are fantastic at blocking out noise and sealing in your audio. The quality of the sound is great, and the ear cups make it comfortable to wear for lengthy periods. With a pivoting headband and rotating ear cups, they fit comfortably and feel durable.
Its comfortable design is dependable for lengthy podcast recordings. They also don't have irritating cables that tangle or get in the way—plug them into a device with a 3.5 mm headphone socket for a superior audio experience.
Recording Software
When you record a podcast, the right software can transform your show from ‘ehh' to amazing!
In choosing podcast software, consider how much editing you intend to do, your level of skill with computer software, and, of course, your budget. There's software for any budget, including some that are free.
Video podcasting is one of the best ways to create great content. It captures video and audio content in one sitting. And then you can distribute it in various formats.
Zoom
So, I'm sure you've all heard of Zoom, but in case you haven't, Zoom is a platform that allows you to hold audio and video conversations with anyone, even from thousands of miles away. I record all my podcasts on Zoom – all of my podcast interviews.
Zoom has several advantages; it's simple to record and free. The only drawback you'll encounter is the degree of quality, whether it's the webcam quality or the audio quality.
What most people don't realize is that if you play with some of the Zoom settings and add a few external tools, it will be much easier to create high-quality remote podcasts that make everyone look good, from you as the show's host to the guests you bring on to the show.
Audacity
Audacity is a cross-platform audio editor that's free to use. It has powerful functionality and is used for podcasting. The disadvantage is that it can be challenging to operate at first, but if you get the hang of it, it's fantastic.
Sync-Lock, Truncate Silence, Silence Finder, and Silence are some of the valuable Audacity features. But there's more, such as saveable EQ, fading, import and export options, and editing and saving effect chains.
It is open source, and is routinely updated and should work with all current macOS and Windows versions.
If you're a complete beginner with no previous audio knowledge and want to start your first podcast, I'd always recommend starting with Audacity.
GarageBand
GarageBand was originally meant for musicians, but it definitely loves podcasters.
Users can add sound using a microphone, interfaces, or musical instruments connected via USB or MIDI ports or by dragging and dropping audio files like loops or pre-recorded sound effects.
GarageBand is exclusively compatible with Apple products. If your goal is to get started on a podcast, and you don't currently own or wish to purchase an Apple PC, this isn't the best option.
Also, not every podcaster wishes to master sound design. When I start looking at audio files in GarageBand, I find myself picking at them for a while. I appreciate that audio editing can be a significant challenge for some podcasters.
GarageBand is a wonderful place to begin learning sound design.
Other software I use (a lot):
BombBomb – I no longer send many text emails unless they are fairly short. Almost all correspondence, especially to potential members, are sent via BombBomb video emails. I generate 5-10 recordings per day. Our engagement rate jumped by a factor of 5-10. No joke.
OBS – I use this to capture higher-quality footage for training videos or edited YouTube videos, although I occasionally use BombBomb. I also use OBS and Restream to live stream to other social media platforms.
Restream – It allows me to stream to several social media networks simultaneously. Everything except Instagram, which I do separately on my phone.
Camtasia – A quick (yet powerful) video editor helps my team and I produce videos efficiently.
Invideo – We use an even faster online video editing technology for shorter form (under 60 seconds) social media videos. Follow us on Twitter to see examples. This is how I plan to promote podcast interviews.
Additional Tips
Audio Treatments
When it comes to audio, superior studios have decent sound clarity. Consider what it's like inside a recording studio or at the audiologist.
Building an acoustically neutral environment ensures a more professional result for recording, broadcasting, and podcasting. It's like being in a pillow fort.
Here’s additional podcasting equipment you can use for audio treatment:
- Audimute Absorption Sheets – Easy to use, Effective, Affordable
- Audimute AcoustiColor Absorption Panels (HD Series) – Minimally invasive acoustic wall panels, durable, tackable, easy to hang
Videos
- You must be constantly mindful of what the camera sees. You must be in a well-lit place with a neutral or blurred background. Wild backdrops and poor lighting will divert attention away from you and make the exchange arduous to see.
- You need to be aware of how you appear. Everything you do will be judged critically, so own your brand. Ensure the camera is on your face (or slightly above) and you're not too close (or slightly above). Obey the rule of thirds.
As I said, most aspiring podcast hosts and guests don't go into podcasting to amass an extensive collection of expensive audio equipment. Of course, some people do this, but you don't have to.
Learn about the ideal podcast equipment and editing software for your needs to spend less time feeling limited by technology and more time creating an audio experience that celebrates you and your listeners.
It's better to focus entirely on your content first rather than worrying about whether or not your extensive podcasting equipment is all up and running. You can adjust and upgrade tools here and there as you keep improving.
Listen to the Thoughtful Entrepreneur
More Resources from UpMyInfluence:
How to Be An Exceptional Podcast Host
LISTEN TO OUR PODCAST: